Video Production Setup for My Online Sketching Class
Online class on Zoom
Previously when I’ve done an online class using Zoom I logged into Zoom with my iPhone focused on me. I then connected as another user using my laptop to which I had a LogiTech C920 webcam connected and pointed at my workspace. And that worked pretty well, but in order to share more inputs, such as slides from a Keynote presentation or images of things I’m talking about I would have had to log into my Zoom “meeting” with yet another device! All that and I have up to four people logged in as students. That takes up a lot of unnecessary frames in Zoom’s gallery view.
My “old” setup.
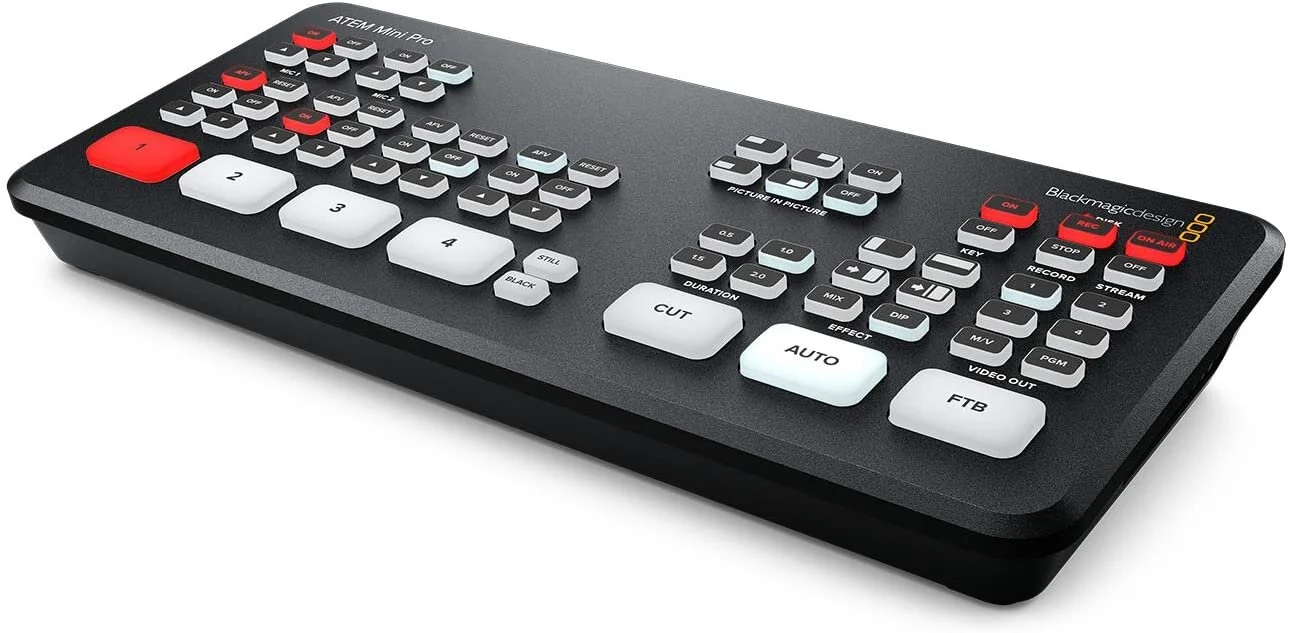
I just took delivery of a device that now makes that unnecessary and gives me production control as though I’m a producer behind the window in a TV studio! The Blackmagic ATEM Mini switcher first hit the market in November 2019, but after ordering it in the beginning days of the stay-at-home orders because of the COVID-19 pandemic, I just received my unit. I’ve set it up and am amazed what this little $295 unit allows me to do. Now $295 is not small change but considering that the new ATEM Mini Pro is double the price and the next unit in the ATEM family is ten times the price, it’s a bargain for what functionality it gives a lone video producer like me!
Wide view. This room has windows on three sides. Very bright!
I bought my Panasonic GX85 camera last January because I wanted to use it as another camera input using the IOS multi camera app Cinamaker. The Panasonic GX85 gives me “clean HDMI” out and worked like a charm with Cinamaker. But now I can also use the Panasonic GX85 as one of four inputs with the ATEM Mini and have it pointed at my class workspace where I’m doing live demonstrations. With the great Panasonic 14-140mm, f/3.5-5.6 lens attached, I can zoom in and out on the workspace as needed.
To use the ATEM Mini to deliver my online classes I connect my iPhone 6S Plus as Camera #1. I use the recording app FilmicPro because it will send a landscape display to the Mini where the iPhone’s default camera app will not. FilmicPro also allows me to send out a “clean” display, meaning I can hide all the on-screen controls when using it as a “camera” into the Mini. I connect my Panasonic GX85 pointed at my desk workspace as Camera #2. I connect my 12.9 iPad Pro as Camera #3 so that I can send a Keynote presentation or images from my iPad to the Mini. That leaves the Camera #4 port unused, but I could add yet one other device to the mix. For example, I could run the Keynote presentation from my iPhone XS and use my 12.9 iPad Pro just to display images related to what I’m demonstrating in a class session.
Click on image to enlarge!
Finally, I connect the ATEM Mini to my MacBook Pro laptop via a USB-C cable and the computer recognizes this connection as a webcam! Everything - all three to four inputs go through the Mini and, depending on which button I press whatever the corresponding “camera” sees, is sent to the laptop and out to Zoom. The beauty with this new setup - which, by the way, I can also use to make YouTube videos - is that I only log into Zoom, or whatever video conferencing software I use, once and with the push of a button I can change what the class participants see in the feed. Even better, the ATEM Mini has a Picture-in-Picture (PIP) feature. Using this feature, I can select my workspace view (Camera #2 in my setup), press the PIP button, and the Camera #1 view (me from the iPhone) appears as an inset window in one of the display corners. Other buttons let me move the PIP window to a screen corner of my choice.
There are many other features available with this little (and it is little!) ATEM Mini device. I’m not sure what others i’l use so I’ll save that discussion for a later blog post. However, let me share just one more with you. The ATEM Mini Media Player allows me to store up to twenty still images in the Mini’s internal memory. This, then, becomes a fifth input source as I can queue up an image and just by clicking the “Still” button on the Mini, that image will fill the screen.
I’m excited to do my next “Sketching & Watercolor Painting On-Location Intro” class using this new tool in my video making toolkit! Watch for a follow-up report on how everything worked. In case you might be interested, here’s a description of the class.

