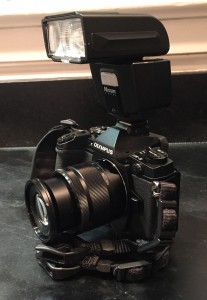
 Today I had the opportunity to do a presentation on flash for the photography club in Kiawah Island, SC. I belong to this club and volunteered to do this short, 90-minute presentation that focused on on-camera flash. I will do a more comprehensive, follow-up presentation on on-camera and off-camera flash next fall when the club starts its 2015-16 season.

I have not been using my i40 that much recently, so doing this presentation forced me to reacquaint myself with its use on-camera with my Olympus OM-D E-M1. After going over some foundation information about using an external flash on one’s camera during the presentation, I switched to live demo mode to show some on-the-spot examples of using an external flash in the hot shoe of one’s camera in TTL flash mode and Manual Shooting Mode. To accomplish this, I connected my E-M1 to my MacBook Pro laptop (called “tethering”) and launched the Olympus Capture program. My laptop was connected to a projector, so as I took shots with my E-M1, they appeared in the capture window of the Olympus Capture program and were immediately projected to the large screen so everyone attending could see the capture. This worked very well. I had originally thought I would have the images immediately imported into Lightroom, but decided that I really didn’t need to do that since the image just taken would appear large on the screen and if I wanted to compare two images (i.e., before/after with no-bounce/bounce or no-diffuser/diffuser), I could do that easily in the Finder of the Mac by going to the folder into which the captured images were being saved.
When I cover this information in my classes or when tutoring one-on-one, I point out that shooting in Manual Shooting Mode on one’s camera gives maximum control over the camera settings, but shooting in TTL mode (“through the lens”) on the flash, essentially the flash’s “Auto” mode, gives maximum flexibility to you as the photographer to move around as when shooting an event. The one thing that I was reminded of by doing this demonstration is that using the Nissan i40 on the Olympus OM-D E-M1 means that you control your Flash Exposure Compensation (FEC) on the back of the i40 NOT on the TTL menu on the E-M1! This is fine but, at the same time disappointing, since the i40 only allows for +-/2 stop flash exposure compensation, whereas the E-M1 controlling a compatible flash allows for +-/3 stop FEC. However, the difference between taking a shot of a subject (willing volunteer from the audience) with 0 FEC and an FEC of +1 and +2 was obvious enough to make the live demo meaningful.
All in all, this is a very capable little external flash unit. It's not terribly powerful but powerful enough. In fact, though max power using an FEC of +2 was good, it was not extremely bright so I demonstrated quickly how to use the flash in manual flash mode. With the i40's flash power set to full, i.e., 1/1, and same camera settings as in previous TTL shot (1/250, f/8, and ISO 400), we got a very blown out shot of the smiling subject. Dialing the power down three stops (1/8 power) yielded an image similar to last one taken in TTL.
When you describe something like using TTL with an on-camera flash to a group of people who haven't used flash, it can sound very confusing. However, hopefully, the demo showed that this is not rocket science and can be done by anyone with a desire to add using flash to his/her photography repertoire.
Update: after some exchange of comments with friends on Facebook, I realize that I was wrong about what I thought was a limitation to control FEC: Setting the i40 to TTL, I can adjust the FEC on back of flash OR on camera's LCD using the E-M1's "super control panel," the SCP. This last thing I missed when getting ready for doing this presentation this morning and because I have just not been using this flash enough!! I thought I was limited to only back of the flash adjustments +/-2! Turns out that you can use the back-of-flash dial AND the in-SCP adjustment together and it is CUMULATIVE! So that means a +/-5 FEC capability! Wow! I was activating the RC Mode and using that menu on camera LCD for TTL adjustments and it was not doing anything. Didn't even think to look on the SCP! Duh!
You can find a PDF of my presentation and recommended resource links at http://www.infotor.com/KIPC.
Please leave me questions or comments on my Facebook page (https://www.facebook.com/billbooz) or on Google+ (http://plus.google.com/+BillBooz). I look forward to interacting with you! Check out my free eBook on Mastering Your Camera's Priority Modes: http://www.infotor.com/ebooks. Download and enjoy! In addition to offering scheduled, hands-on photography classes periodically, I am also available to do one-on-one tutoring or small group lessons designed to meet YOUR needs and what you want to learn in the area of photography, using flashes, or the use of Apple products and software. Give yourself the gift of learning: http://www.infotor.com/photoclasses! And check out my tutoring bundle: http://www.infotor.com/photoclasses/tutoringbundle.php as well. A PDF of my brochure is at http://www.infotor.com/photoclasses/brochures/WHBI-Brochure_2015.pdf.

