I’m new to using Adobe Premiere Elements. In the past I have used iMovie and Final Cut Express on my Mac. I have been trying to learn how to use Premiere Elements’ general tools and have watched several videos on YouTube, as well as working my way through a course on lynda.com. I’m not finding a lot of help on shortcuts and ways to use blocks of video over and over, but I think I now have that figured out.
Each time I put together a video from the recordings I made, I had to start over, as I didn’t see a way to copy and paste parts of a previous video project (Premiere's term for a video creation file) into a new project. So, I ended up having to recreate my opening screens (called “intros”) each time I made a new video. Day before yesterday, I figured out that I could create a project with just my intros that included a screen with my series name (“Booz Photography Learning Center”) and my name, I then exported that as an MOV file that I could import into the next video project and simply lay it in as the initial clip on the video timeline. I did the same think for my outro screens (URL for my blog and a copyright notice). That will save me having to recreate these screens every time I produce a video.
However, last night I had a brainstorm. How about if I create a project that includes all of these components and save it as template project file? Premiere Elements doesn’t appear to have a “save as template” feature, so I simply laid out my intro screens with music, a placeholder screen for the episode title screen, and my outro screens. I then saved it as a standard Premiere Elements project file. Now, when I am ready to produce another video, I simply load this template file, use “Save As…” to save it as a new template file with my next video’s name, and begin importing clips and assets for the new video! It works great and will save me tons of time as I start to get into producing more videos. Whew! I knew there had to be a better way to do all of this!
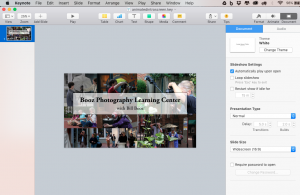
One last tidbit I learned during this process. I watched a video on YouTube that showed how to use Keynote (you could also use Powerpoint) to create screens for use in intros and outros. Doing this allows one to add animation that is very easy to apply to the Keynote pages. When you are satisfied with your work, you simple export it as a movie file in the M4V format that you can import into Premiere Elements. Brilliant!
There are so many new things to learn when turning from still photography to creating videos. And just as post-processing images you have captured requires a brand new skill set and the learning of such tools as Lightroom, Photoshop, or some other editing program, so does the final production of one's video. If you have some tips and tricks to share in the area of video production, please share them in comments on my Facebook or Google+ pages (links below). I would like to hear them and, perhaps, they can help me and others become better at this whole video production thing!.
If you would be interested in virtual tutoring sessions using either Skype or Google Hangouts, please drop me and e-mail or leave a private message to me on Facebook or Google+.
Please leave me questions or comments on my Facebook page (https://www.facebook.com/billbooz) or on Google+ (http://plus.google.com/+BillBooz). I look forward to interacting with you!
Please follow my learning how to record video with my Olympus OM-D E-M1 on my YouTube Channel!
Check out my free eBook on Mastering Your Camera's Priority Modes: http://www.infotor.com/ebooks. Download and enjoy!
I am available to do one-on-one tutoring or small group lessons designed to meet YOUR needs and what you want to learn in the area of photography, using flashes, or the use of Apple products and software. Give yourself the gift of learning: http://www.infotor.com/photoclasses! And check out my tutoring bundle: http://www.infotor.com/photoclasses/tutoringbundle.php as well. A PDF of my brochure is at http://www.infotor.com/photoclasses/brochures/WHBI_2015-16Brochure.pdf.


