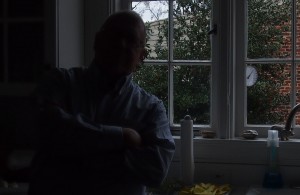
 Have you ever taken a picture of someone in front of a bright window or in a location where there was lots of light behind your subject? The resulting image probably looked something like this one, right? Can't really even tell there is anyone in the shot, can you?
What has happened is that your camera's light meter has "seen" all that light coming through the window and tried to underexpose the image to get a "correct" exposure on what is outside the window. In the case of this scene, it is our neighbor's red brick house and a holly tree.
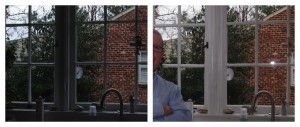
Looking at the partial pull-back shot in the accompanying composite collection of shots below, you can see the building and tree are exposed correctly. The camera's attempt to get a good exposure of what's outside the window, unfortunately, underexposes any subject standing in front of the window. Me, in this case. You could do a meter reading on the subject and get a "correct" exposure of the subject, then the outside would be way overexposed.
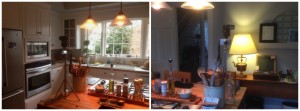
However, you can get a more balanced exposure, where what's outside the window AND what is in front of the window are both exposed in a pleasing and acceptable manner. And, the way to accomplish this is by using one simple and inexpensive flash unit. For this example, I used my $40 Neewer TT560 Speedlight which allows me to both turn and tilt the flash head so I could bounce the flash off our white kitchen cabinets back onto myself. Not only does this illustrate how using an external flash (as opposed to the built-in, pop-up flash on your camera) can solve the backlighting problem in this scene, but it also shows how taking a picture using flash is really like taking two pictures in one! In the composite series, the first image was one I took without flash but exposed to get an acceptable exposure of what is outside the window.  As a result, the window frame and kitchen are both dark, underexposed, but that is okay because I know I am going to add flash. The second image simply illustrates again that anyone standing in front of the window will be rendered a silhouette. The third image shows the result of adding a flash to the mix. The image to the right shows how I set my Olmpus PL3 with the Neewer flash attached on a tripod on the kitchen island counter and pointed the camera at the window (and me), but the flash head off to camera left so the light would bounce off the cabinets and microwave. I set the camera to a 12-second delay when I put myself in the shot.
 If you look carefully, what is outside remains exposed the same, though, since the flash is lighting up the windows the trees seem a bit lighter in the second shot.
This is a good step-by-step procedure when shooting with flash and assuming you are shooting in Manual Shooting Mode: (1) turn off your flash and get a correctly (to your taste!) exposure of the scene, (2) leave your shutter speed and aperture as you had them in your background test shot and turn on your flash, (3) set your flash to Manual and set its power to 1/8 for a test shot, (4) increase or decrease your flash power if your subject is under- or overexposed, respectively. Remember, you leave your cameras settings as they were after doing step #1! If you don't want to try Manual flash, leave your flash in TTL mode and adjust exposure using Flash Exposure Compensation.
I will be offering a morning session of my "iPhone Photography" and a morning and evening session of my "On-Camera Flash: Using an External Flash on Your Camera" classes in January/February and March/April in Lynchburg. In addition to these classes I am also available to do one-on-one tutoring or small group lessons designed to meet YOUR needs and what you want to learn in the area of photography, using flashes, or the use of Apple products and software. Give yourself the gift of learning: http://www.infotor.com/photoclasses! Check out the holiday discount for my tutoring bundle: http://www.infotor.com/photoclasses/tutoringbundle.php as well.
