 I bought the PhotoSync app some time ago, but didn’t use it a whole lot. After all, Apple’s PhotoStream was working great and made images from my iPhone available on my iPad and vice versa. I could even access them on my MacBook Pro laptop using iPhoto, so I was in good shape. I thought. Then I decided to create an eBook of our 70th birthday celebration in Kiawah Island, SC, this past summer as a Christmas gift to our children and their children.
Well, since this event occurred some five months ago, I had - I thought - all of the images I was going to use for the eBook carefully stored away in Adobe Lightroom. Therefore, I went into Lightroom, reviewed the images, and exported them out to a folder that I could easily access as I developed the eBook. However, every now and then I realized that there was an image still hanging out on my iPhone or my iPad that I wanted to use, but it was not in Lightroom, not even on my laptop. Therefore, I needed to transfer the images to the laptop where I was doing the actual eBook “production.”
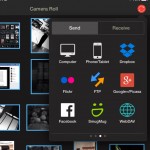
There are lots of different ways to do this these days. However, I already had PhotoSync on both of my mobile devices and on my laptop, so ti was the logical choice for me. It is very slick to use. The usual scenario is I just described it, that is, I have one or more images already in my camera roll on either mobile device and need it on my laptop. First, I launch PhotoSync on the mobile device then on my laptop. On my iPad, for example, I then select the location of the image or images I want to transfer (Camera Roll, My Photostream, or a shared Photostream), I select the images, then click on the PhotoSync “sync” button.
Since I have PhotoSync running on my laptop, it shows up as one of the destinations to which I can transfer my selected images. I select it and PhotoSync immediately begins transferring the image files. Both the iPad and laptop must be on the same Wi-Fi network!
I switch over to my laptop and a window (on my MacBook Pro, it’s a Finder window) has opened on the desktop showing me where the files are. On my Mac, I have set PhotoSynch to save the transferred files in my Pictures folder. The App creates a folder named “PhotoSync Images” and inside that folder, it creates a folder named after the device that sent the image files.
In the case of my iPad, it names the folder “Bill’s iPad 3.” Inside that appears another folder named after the source, for example, “Camera Roll” or “Photostream.” I can now move the received images wherever I need them to be stored on my hard drive and work with them with editing software, etc.
The most common way I use PhotoSync, though, is to retrieve images from my iPhone that I have taken with my iPhone. I often take images of things I am talking about in a blog post and I want to use the images to illustrate the post. Additionally, I typically import images from my Olympus OM-D E-M1 to my iPad and will then transfer select images to my laptop. I do this when I am working on a blog post or a publication on my laptop and want to include images I have taken with my E-M1.  Yet another scenario is where friends or family have images they want to share with me after an event or gathering, for example. They install PhotoSync and we are good to go! Yes, there are things like AirDrop and Photostream Sharing, but it’s not always real straightforward to explain to others. Or, your friend has an Android phone. Voila! PhotoSync is available for Android as well.
Yes, PhotoSync is definitely a life saver for me. Give it a try and let me know what unique ways you have found to use it! (Note: the mobile app is only $2.99 and the computer version is free: http://www.photosync-app.com.)
 Because of spammers, I have disabled blog comments, but please leave me questions or comments on my Facebook page (https://www.facebook.com/billbooz) or on Google+ (http://plus.google.com/+BillBooz). I look forward to interacting with you!
Check out my free eBook on Mastering Your Camera's Priority Modes: http://www.infotor.com/ebooks. Download and enjoy!
In addition to offering scheduled, hands-on photography classes periodically, I am also available to do one-on-one tutoring or small group lessons designed to meet YOUR needs and what you want to learn in the area of photography, using flashes, or the use of Apple products and software. Give yourself the gift of learning: http://www.infotor.com/photoclasses! And check out my tutoring bundle: http://www.infotor.com/photoclasses/tutoringbundle.php as well. A PDF of my brochure is at http://www.infotor.com/photoclasses/brochures/WHBI-Brochure_2015.pdf.


